Excel Set Printable Area
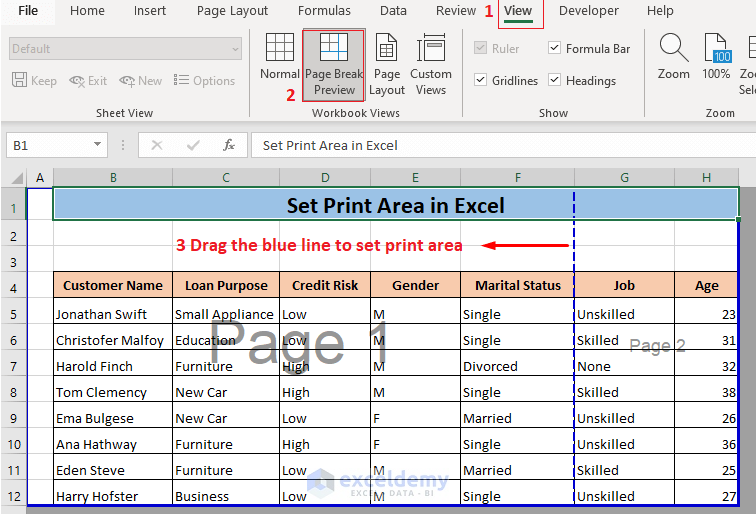
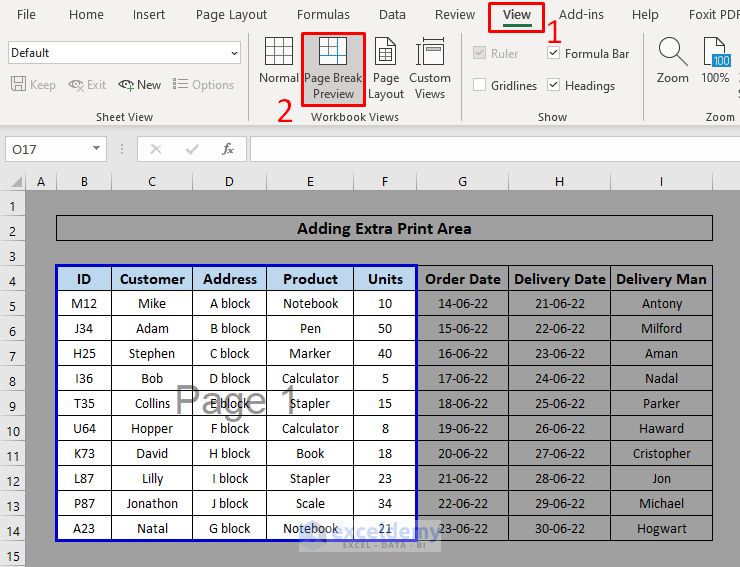
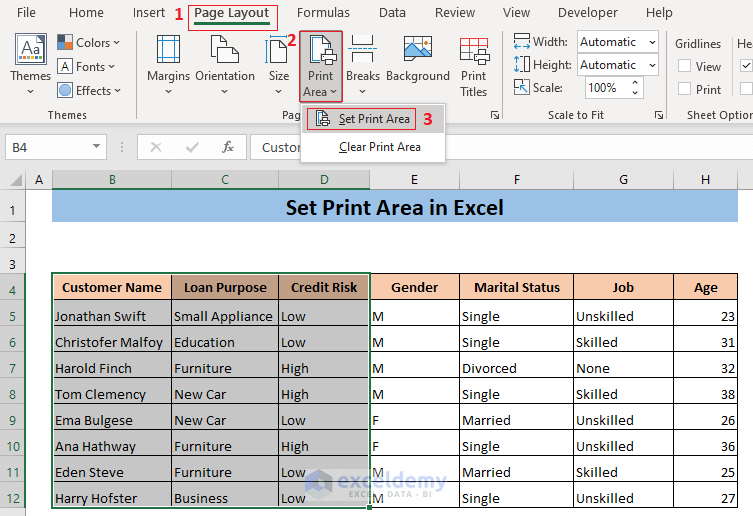
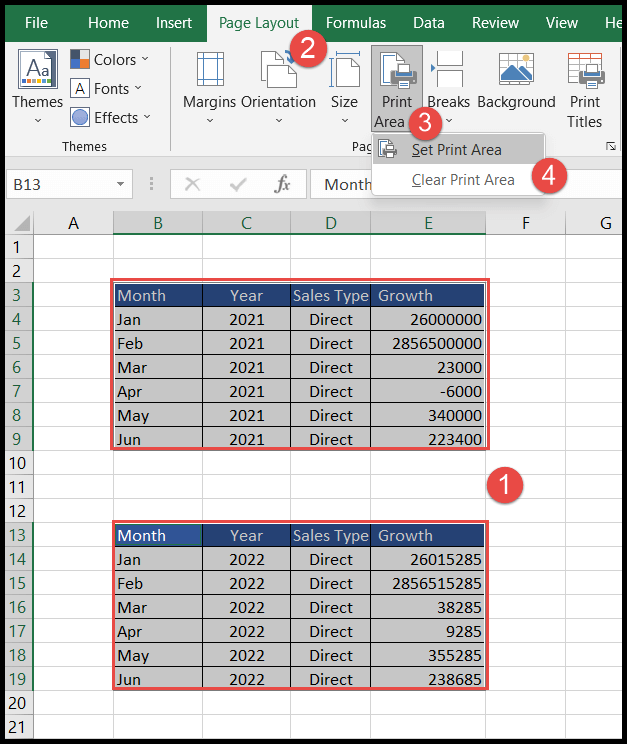
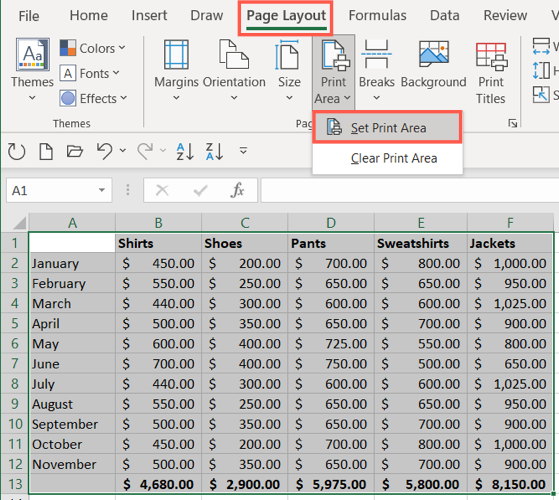
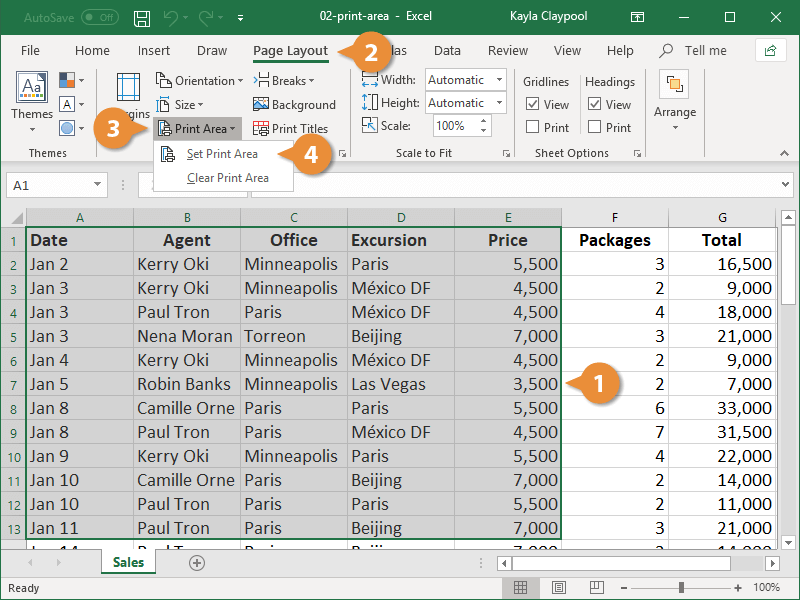
Excel Set Printable Area - Here are the steps to follow: Select the range of cells that you want to set as the print area in that excel worksheet. In short, you have to navigate to “page layout” > “page setup” > “print area” > “set print area.” in this article, i’ll show you how to set the print area for microsoft excel. While excel does add page breaks automatically (indicated by a dashed line), you can also insert, move, or delete page breaks in a worksheet. Go to the page layout tab and click print area, then select set print area. this action will define the highlighted cells as the first print area. Explore how to set a print area in excel by following these steps: What we want to accomplish: To do this, you need to. Here's how to do it: Select a range of cells. What we want to accomplish: 목차 엑셀 인쇄영역 설정 기본부터 📑 페이지 나누기 미리보기 사용법 🔍. Explore how to set a print area in excel by following these steps: Navigate to the view tab and click on page break preview.; If you only need to print a section of your. Then, go to the page layout tab and. To do this, you need to. How to set a print area in excel you can set one or more print areas in the same excel sheet. If you only need to print a section of your. Here's how to do it: Inilah beberapa langkah yang harus kamu lakukan saat ingin cetak file excel yang tidak terpotong: Select a range of cells. Here are the steps to follow: Here are the steps to set the print area in excel: While excel does add page breaks automatically (indicated by a dashed line), you can also insert, move, or delete page breaks in a. Highlight the area you want to set as the printable area. Cara print excel agar tidak terpotong. Inilah beberapa langkah yang harus kamu lakukan saat ingin cetak file excel yang tidak terpotong: Here's how to do it: To set a print area, execute the following steps. In short, you have to navigate to “page layout” > “page setup” > “print area” > “set print area.” in this article, i’ll show you how to set the print area for microsoft excel. Inilah beberapa langkah yang harus kamu lakukan saat ingin cetak file excel yang tidak terpotong: select the cells you want to print. Then, go to. Inilah beberapa langkah yang harus kamu lakukan saat ingin cetak file excel yang tidak terpotong: Here's how to do it: Select a range of cells. To set the print area, you select the area and hit the set print area command; You will know the print area is set when you. Choose the cells we aim to set as the required print area. 엑셀 인쇄영역 설정은 직장인이 알아야 할 중요한 스킬입니다. In this section, we'll guide you on how to apply this feature to set one or. If you only need to print a section of your. On the page layout tab, in the page setup group, click print area. Make sure you include all the relevant cells and columns that you want in the printout. What we want to accomplish: Setting the print area in excel for multiple pages can save time and paper by ensuring only the parts of your spreadsheet you need are printed. Select the range of cells that you want to set as the print. On the page layout tab, in the page setup group, click print area. Select the range of cells that you want to set as the print area in that excel worksheet. What we want to accomplish: In this tutorial, you will learn how to select print area in excel manually and how to set print ranges for multiple sheets by. To do this, you need to. 목차 엑셀 인쇄영역 설정 기본부터 📑 페이지 나누기 미리보기 사용법 🔍. In this section, we'll guide you on how to apply this feature to set one or. Highlight the area you want to set as the printable area. You will know the print area is set when you. When you hit the print button in excel,. In short, you have to navigate to “page layout” > “page setup” > “print area” > “set print area.” in this article, i’ll show you how to set the print area for microsoft excel. Here's how to do it: Cara print excel agar tidak terpotong. Highlight the area you want to set as the printable area. Make sure you include all the relevant cells and columns that you want in the printout. To do this, you need to. Then, go to the page layout tab and. To set a single print area, select the cells. Explore how to set a print area in excel by following these steps: Inilah beberapa langkah yang harus kamu lakukan saat ingin cetak file excel yang tidak terpotong: Select the range of cells that you want to set as the print area in that excel worksheet. Select a range of cells. Go to the page layout tab and click print area, then select set print area. this action will define the highlighted cells as the first print area. To set the print area, you select the area and hit the set print area command; How to set a print area in excel you can set one or more print areas in the same excel sheet.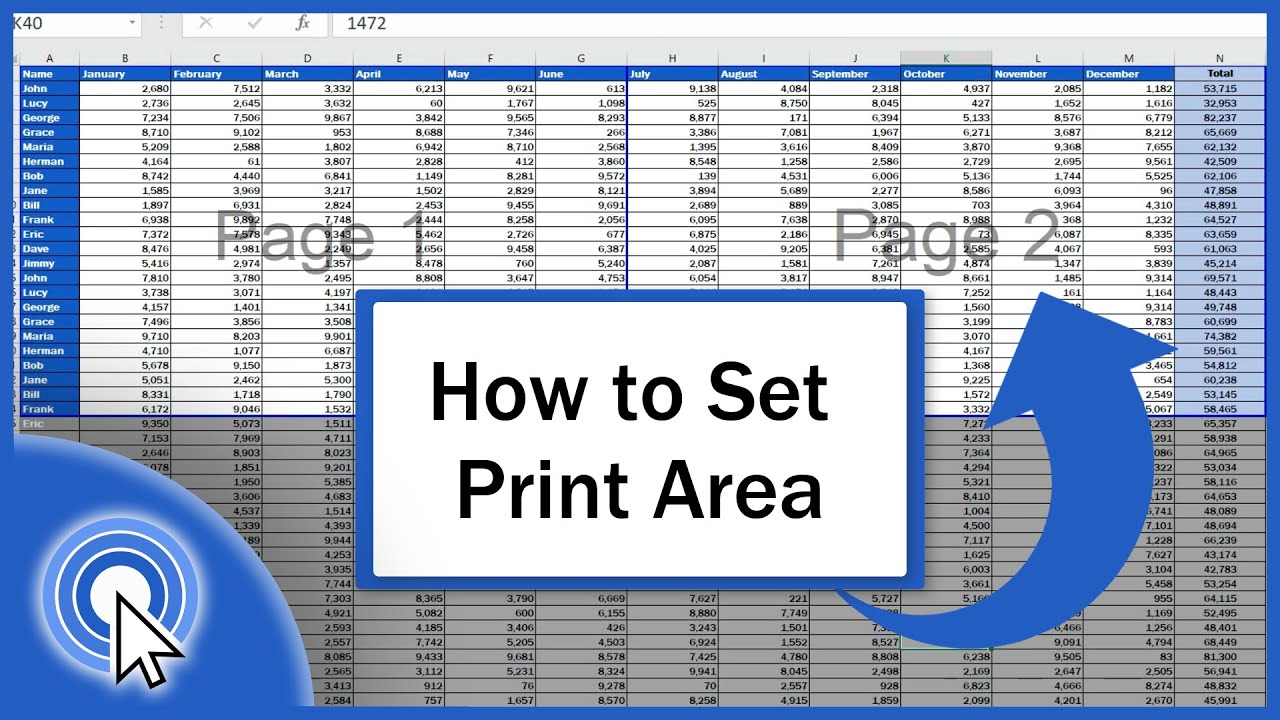
How to Set the Print Area in Excel (Step by Step) YouTube
How to Set Print Area in Excel (5 Methods) ExcelDemy
:max_bytes(150000):strip_icc()/ExcelSetPrintArea-5c23d199c9e77c0001adc722.jpg)
How To Select Printable Area In Excel

How to Set the Print Area in MS Excel OfficeBeginner
How to Set Print Area with Blue Line in Excel 5 Easy Ways
How to Set Print Area in Excel (5 Methods) ExcelDemy
How to Set Print Area in Excel (Add, Clear, and Ignore)
How to Set the Print Area in Microsoft Excel
How to Set Print Area in Excel CustomGuide
:max_bytes(150000):strip_icc()/ExcelPageBreakPreview-5c1c28c8c9e77c00017a2ade.jpg)
How to set print area in excel rewacharity
We Will Also Be Covering Some Necessary Checks And Options You Have To Set.
엑셀 인쇄영역 설정은 직장인이 알아야 할 중요한 스킬입니다.
Select Another Range Of Cells You.
In This Tutorial, You Will Learn How To Select Print Area In Excel Manually And How To Set Print Ranges For Multiple Sheets By Using Macros.
Related Post: