Origami Corner Bookmark Printable Instructions
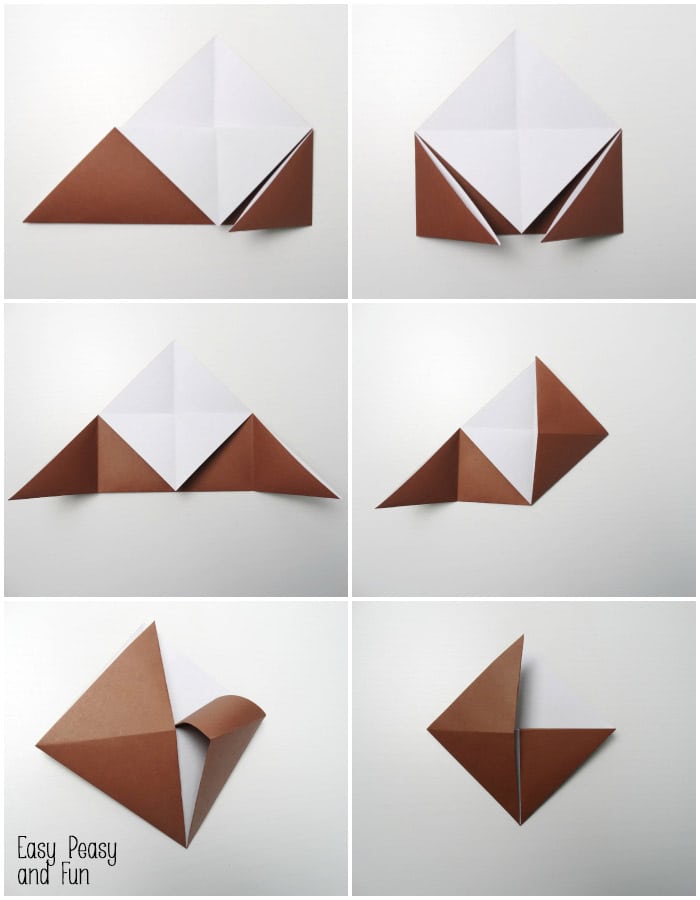
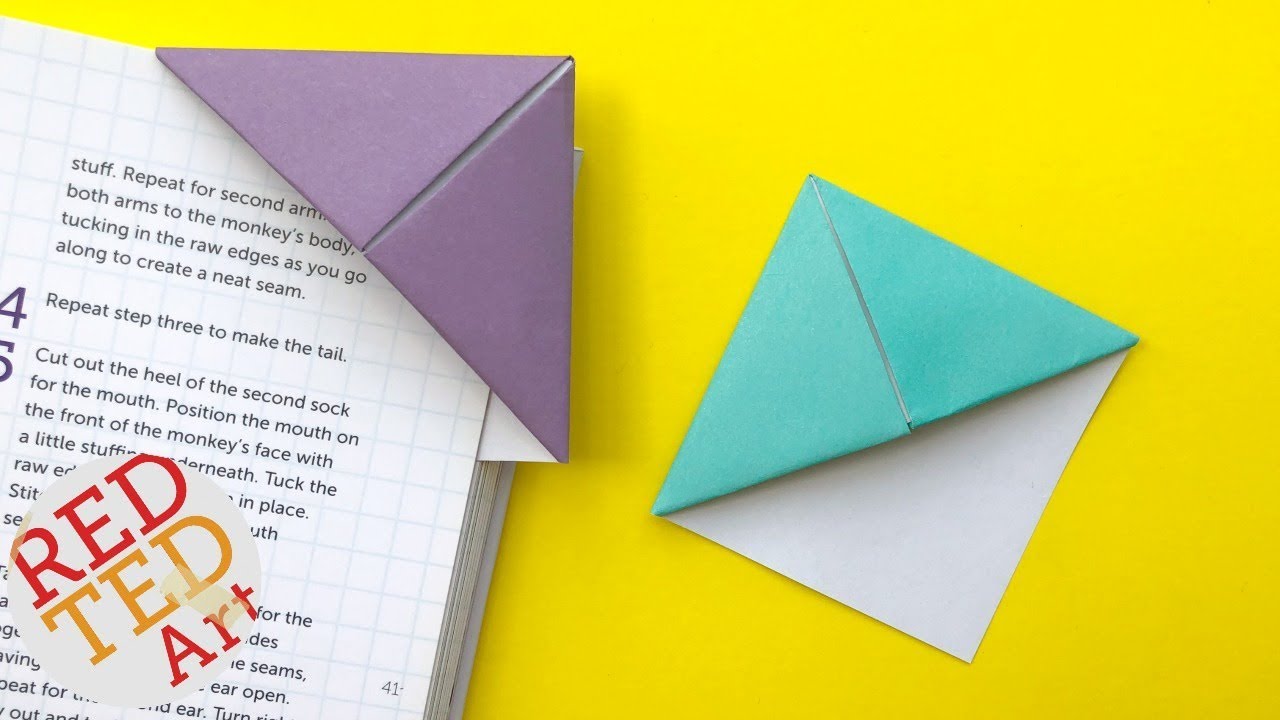
Origami Corner Bookmark Printable Instructions - All you need is a piece of paper to make the corner bookmark. Hold the origami in your and push the crease in on itself. Web or, see below for the instructions. Web instructions fold the square paper across the diagonal to make a triangle rotate to bring the long edge parallel, then bring the right corner up to meet the top corner repeat with the corner. Web place your origami flat down. You can use origami paper, printer paper, or. Repeat with the other side to form a square. The second cheats a little by using scissors and a glue stick, but it makes room for more creative expression. Crease the paper at the fold. Web cut a piece of colored paper into a 6×6 inch square. How to make a paper corner bookmark. Start by placing the paper with the corner facing you and the. Construction paper, crepe paper, or tissue paper are perfectly. Choose your favorite template below, then print and cut it out. Repeat with the other side to form a square. Web free printable bookmarks. Hold the origami in your and push the crease in on itself. Crease well and then unfold. We also attached 2 small strips on the top side of the origami pattern, between the wings; Web make the initial folds. Unfold steps 3 and 4 leaving a triangle. We also attached 2 small strips on the top side of the origami pattern, between the wings; You will get a shape of a triangle. 7 take the right corner of the triangle and fold it to meet the top corner of the triangle. Crease well and then unfold. You can use a ruler and scissors or a rotary cutter. How to make a paper corner bookmark. 8 fold the same corner tucking it into The origami bookmarks below were created using a 5 inch square. Crease the paper at the fold. Fold in half so that the graphics are on the outside of the page. Web instructions this really is an easy craft project, but sometimes it helps to have an actual photo of the steps involved. Prepare to craft first, gather up your supplies and cut your paper into 6″x6″ squares. Web the first is classic, requiring nothing but origami. Now cut the adjacent two squares from the one you’ve cut out as shown on the picture (diagonally through the square). Depending on the finished size you desire somewhere between four and six inches is a good starting point. Follow the instructions below to create your very own origami bookmark! You can use a ruler and scissors or a rotary cutter. We’re using a matching highlighter to draw the wing patterns. Web place your origami flat down. Fold each point of the triangle up to meet the tip. Or you can use a paper trimmer to cut your squares. Trim along lines to cut out the square. Web the first is classic, requiring nothing but origami or square paper and your hands. Crease the paper at the bottom of the triangle. You can also find origami paper at most craft stores or big box stores. We also attached 2 small strips on the top side of the origami pattern, between the wings; Both colored areas should show on the top of the triangle. Make a middle small triangular flap, by taking the corner and folding up (top left image). You can use a variety of paper for this, whether it's plain or colorful, matte or shiny.:max_bytes(150000):strip_icc()/step3-56a6e8795f9b58b7d0e56ed5.jpg)
How to Make an Origami Corner Bookmark

Origami Corner Bookmark Instructions Origami
Reindeer Origami Corner Bookmark Easy Peasy and Fun

Origami Corner Bookmark Instructions Origami bookmark, Bookmark
Best Origami Corner Bookmark Printable Instructions Kaylee Blog
You Will Need To Unzip The File To Print Each One.
Web How To Fold A Basic Origami Bookmark.
These Will Be Sent As A Zip File With All Three Designs Included.
How To Make A Paper Corner Bookmark.
Related Post: